Friday 22 March 2013

CAKUI OR PAK TUNGKU


Ingredients
  • 260g (about 2 cups and 3 tablespoons) bread flour, plus more for dusting
  • 170g (3/4 cup) lukewarm water (100-110 degrees F)
  • 2g (1 teaspoon) active dry yeast
  • 2g (1 teaspoon) baking ammonia (see notes)
  • ½ teaspoon alum powder (see notes)
  • 8g (1½ teaspoons) salt
  • 14g (1 tablespoon) granulated sugar
  • 1 tablespoon vegetable oil
  • 4g (2 teaspoons) baking powder
Instructions
  1. Add all the ingredients, except baking powder, into the bowl of an electric mixer attached with a dough hook; mix on medium-high for 8-10 minutes. The dough will be quite wet, and you may be tempted to add more flour to it. Don’t. The moisture in the dough is what creates steam inside the crullers when they’re in the hot oil. Besides, once the dough has rested, it becomes a bit firmer and more manageable.
  2. Put about 2 tablespoons of vegetable oil (additional to 1 tablespoon in the dough) into a separate bowl and rub the bottom of the bowl with it. With oiled hands, form the dough into a round ball as best as you can. If you can’t turn it into a smooth ball, don’t worry. It doesn’t matter. Make sure the dough ball is covered with oil.
  3. Cover the bowl with a kitchen towel and let it rest for 4-5 hours.
  4. After 4-5 hours, you will see that dough has not risen much, if at all; no worries. Everything’s fine.
  5. Take the dough out onto your kitchen counter which has been dusted with more flour. Spread it out with your hands. Sprinkle the baking powder all over the surface of the dough.
  6. Fold the dough in half over itself and push it slightly forward with the heels of your hands. Give the dough a quarter turn; repeat with the folding and stretching 3-4 more times.
  7. Once the baking powder has been incorporated into the dough, form the dough into a ball.
  8. Cut the ball in half.
  9. Working with one half at a time (keep the other half covered), spread the dough out with your hands and pat it down until you get an 8×5-inch rectangle.
  10. Cut the rectangle in half lengthwise into 8 strips of equal size, then cut the 8 strips crosswise in half.
  11. Repeat the process with remaining dough.
  12. Heat some vegetable oil in a fryer, making sure the oil is at least 3 inches deep.
  13. While waiting for the oil to heat up, get a bowl of water and start making conjoined dough twins. You do that by rubbing some water in the middle of one piece of dough (covering about an inch) on top of another piece of dough and pressing the two together at the spot where the water is. Arrange them on a platter in a single layer. Repeat until you’ve run out of dough strips.
  14. Once the oil reaches 350 degrees F (if you don’t have a thermometer, do a chopstick test by pressing the tip of a wooden chopstick against the bottom of the fryer. If you see bubbles, the oil is ready), gently lower the twins into it. Don’t crowd the fryer. You don’t want the oil temperature to drop too quickly, and you want to have enough room to flip the twins around.
  15. Flip the twins around (did I just repeat myself?) constantly (This is easy to do with a pair of wooden chopsticks.) until they have puffed up and become golden brown all over.
  16. Fish them out onto a paper towel-lined cookie sheet. Arrange them in a single layer.
  17. Consume when slightly warm. Serve with sweetened condensed milk or Thai dipping custard (sangkhaya).


Bahan-Bahan:
1kg tepung gandun (anchor brand)
1 pkt instant yeast (mauripan)
½ cawan minyak mazola}
1½ cawan gula pasir }satukan
3½ cawan air }
sedikit garam }
2 biji telur
1 sudu teh bikarbonat soda
1 sudu teh air kapur
Cara:
*satukan tepung gandum dan yis. Pecahkan telur kedalam adunan tepung tadi, gaul.
*masukkan bahan yang telah dilarutkan bersama air.
*uli adunan hingga licin dan tidak melekat di tangan.
*tutup adunan dengan tuala lembab, biar 2 jam atau hingga keesokan pagi.
*uli semula adunan tersebut hingga licin dan lembut.
*ambil sedikit adunan dan canaikan.
*potong bentuk memanjang 7 X 2 cm
*guna lidi atau buluh bunga telur, celupkan dalam air dan basahkan bahagian tengah adunan yang dipotong tadi.
*ambil adunan lain yang telah dipotong sama saiz, lekatkan, tekan sedikit dibahagian yang dibasahkan dengan air tadi.
*ulangi proses dan goreng dalam minyak penuh dan api sederhana 
Cadangan Hidangan:
boleh makan begitu sahaja atau disapu dengan mentega, kaya, jem atau dimakan bersama kuah kacang.
Tambahan:
semakin lama anda uli, adunan akan bertambah lembut (fine)

boleh guna yis basah(beku)dan hasilnya lebih baik.

minyak mazola bolah diganti dengan minyak masak atau mentega/marjerin yang dicairkan


2) CAKUI

400 gm tpg gandum
4 gm yis segera
1/2 sdb shortening
1 sdb marjerin
1 biji telur
1 sdb susu pekat/ gula
secubit garam
+ - 1 1/2 cwn air

ku cairkan marjerin then sejukkan, pastu masukkan telur dan kacau sebati. yis di larutkan dlm air dengan 1 sdt gula dan biar kembang. Satukan tepung dengan garam, shortening dan susu. gaul sebati. kemudian masukkan campuran telur dan marjerin and masukkan yis dan air. kacau sebati dan perap lebihkurang 3-4 jam. Bentukkan dan goreng dlm minyak panas.

kuah kacang

5 btg cili kering - digoreng dlm minyak
1 labu bwg besar - dipotong kasar dan digoreng hingga layu tak perlu hingga garing
sengengggam kacang tanah - digoreng tanpa minyak
gula, garam dan air asam jawa - sesedap rasa

blend cili kering dan kacang tanah bersama air dlm blender. blend atau tumbuk bawang yg digoreng tadi. panaskan minyak tumis bawang dahulu dah naik bau dan agak garing masukkan kacang dan cili yang dah diblend. tambah air jika perlu. kemudian biar didih seketika dan masukkan gula, garam dan air asam sesedap rasa.


3) Yau Char Kwai


Our group of Malaysian ladies attempted making Yau Char Kwai this month. We tried out two recipes and one turn out really well and one failed miserably. Not sure what went wrong with the failed recipe as we follow the ingredients and instructions to the T. Anyhow, we were glad Agnes Chang recipe turns out so well with less work and proofing time compare to the other one. The YCK were light with hollow texture on the inside. So the next time if we are going to make this again we will just stick to this recipe.


For more information about the Chinese Crullers/Yau Char Kwai please readhere. As for more information on Ammonia Powder please refer to here. For me information for Alum please refer here 

Ingredients A
(Adapted from Agnes Chang’s Hawker’s Delights with minor changes)

1 tsp dried yeast
1 tsp sugar
2 tbsp lukewarm water

Ingredients B

250 ml water
1 tsp baking soda
½ tsp Ammonia powder (chow fun)
½ tsp of Alum (pak fun)

Ingredient C

300 grm bread flour (we used 320 grm)
1 tsp salt

(I put both successful and failed YCK together for comparison. Just look at the difference in size)

1. Mix all the ingredients A and set it aside for 10 – 15 minutes until it get foamy.
2. Mix ingredients B. Sift ingredient C into a mixing bowl. Add in mixture of A and B into the flour. Used a wooden spoon, mix the dough until well combined. Knead it for 5 minutes and if the dough is too sticky to work with add a little bit more flour.
3. Cover with a plastic wrap and let the dough rest for 2 hours.

4. Turn the dough out to the well floured work surface. Sprinkle some flour on the dough and roll the dough out into a long rectangle. Cut into 1” strips. Place two strips, one on top of each. Let it rest for another 5 minutes.
5. In the meantime, prepare oil for deep frying. 


6. Press lightly on the two strips of dough with a chopstick. Holds both ends of the dough and stretch the strips a little and lower into hot oil. Deep fry, turning constantly until each cruller turns puffy and golden brown. 


Note: The dough is pretty sticky to work with so make sure your work surface, hands and utensils are well coated with flour.


4) PA THONG KO (THAI VERSI)


I chuckled when reading up on the history of these Chinese crullers, you tiao (油条), which have been localized in Thailand into Pa Thong Ko (ปาท่องโก๋).
According to the widely-circulated Chinese folk etymology, these pairs of dough sticks apparently represent two evil people who deserve to suffer in hot oil. To the Thai people, the conjoined crullers represent something cuter and more romantic: a couple who are deeply attached to one another and seen together all the time. Symbols and figures of speech behave like that across the various cultures. The Zealous Water Buffalo, my alter ego, has written about these things.
Another funny thing about Pa Thong Ko: it is a misnomer resulted from confusion on the Thai’s part over the various goodies sold by Chinese immigrants from years ago; it’s not even a localized pronunciation of the original Chinese, but a wrong name altogether. We could have gone with something close toyou char kway (油炸粿) or something similar to that as the Chinese words that have entered our vernacular often come from the Hokkien or Teochew dialects. But, apparently, a mistake was made a while back and it has stuck with us ever since. In other words, unless you speak to someone who knows Chinese, your inquiry about youtiao or you char kway in Thailand will be met with a,”Huh?
More differences.
Pa Thong Ko comes in smaller size — generally around 3-4 inches in length whereas youtiao could be as long as a couple of feet. Also, when I was growing up — maybe it’s my imagination — Pa Thong Ko seemed to resemble their Chinese prototype more both in terms of appearance (blistered, bubbly, crispy exterior) and texture (soft and slightly chewy with honeycomb-like crumb). These days, they seem to have morphed into crullers that look smoother on the surface, more crusty than crispy on the outside, and doughy on the inside. Rarely do you find Pa Thong Ko made the way they were years ago. (I’m not complaining; I’m just reporting what I’ve found. In fact, what you see here is my attempt at replicating Pa Thong Ko as they are made these days, albeit more crispy than crusty.)
Also, the Thai people like to eat these crullers with sweetened condensed milk, coffee, or dipping custard, Sangkhaya (สังขยา). They are also served with Chinese congee, jok (โจ๊ก).
Note that there’s another kind of fried dough that is also called Pa Thong Ko, but it’s almost entirely different from what’s in view here. This type of Pa Thong Ko is smaller, fried until thoroughly crispy, and served as an accompaniment to Chinese-style soybean curd in warm ginger syrup (เต้าฮวยน้ำขิง).
Enough with the background information. Let’s talk about how to make these crullers.
First of all — and this may sound harsh — assuming my opinion means anything to you: if you see recipes for Pa Thong Ko that don’t call for both baking ammonia and alum powder, I wouldn’t even think about messing around with them. I’m serious. That’s the whole point of being a recipe tester: I waste my time and money, so you won’t have to. And, boy, did I do just that. With just baking powder, your Pa Thong Ko will be doughnut-like, and you and I both know Pa Thong Ko aren’t doughnut-like. With just baking soda, your Pa Thong Ko come out crusty (as opposed to crispy) on the outside and hollow on the inside. Again, we both know that doesn’t describe good Pa Thong Ko.
My recipe takes no chances. It has ammonia, alum, and yeast. Baking powder is added at the last stage just before the dough is formed to give it a lift in the deep-fryer. The result is Pa Thong Ko with open crumb (but not hollow) and crispy exterior. When you bite into one, it collapses between your teeth. No bouncy resistance as is the case with yeast doughnuts.
The ammonia also gives the crullers that familiar scent that’s just faint enough to be pleasantly reminiscent of Pa Thong Ko from the streets of Bangkok, but not so strong that it reminds you of … I’ll shut up now.
I’ll admit, though, that even though this recipe represents my best attempt to date, I still won’t give it an A or an A+. Maybe a B+. I’m satisfied with the texture and flavor, but shaping the dough into pairs of Pa Thong Ko in a uniformed manner is still a struggle for me.
This is because the dough is wet. It has to be wet; otherwise, you won’t get the open crumb. Adding more flour to the dough defeats this purpose. Keeping the flour at this amount presents a bit of a problem for an amateur Pa Thong Ko maker like me as the two pieces of dough tend to merge together a little too seamlessly. You see, well-formed pairs of Pa Thong Ko kind of have to remain visibly two separate entities conjoined in the middle. It’s going to take some practice.
I don’t even try to come up with a more creative way of shaping Pa Thong Ko. Forget dragon-shaped Pa Thong Ko or dinosaur-shaped Pa Thong Ko; I have a hard enough time making the classic shape.

The rest is pretty easy, actually. The recipe has produced very consistent results for me during the past several months of testing and retesting. Be sure to secure all the necessary ingredients. Alum powder is found either in the spice aisle or canning aisle. Ammonia powder is a little harder to find at a local supermarket, but you can find it online easily.
Lastly, have some sweetened condensed milk around — like I need to tell you that — to dip these crullers in. I don’t care much for Pa Thong Ko dipped in Thai dipping custard (sangkhaya), but sweetened condensed milk — hohohohohoho.


5) CHINESE CRULLER


On how to make it at home, here is the recipe ...


Pic: You Tiao and the salty soybean milk

Crispy Chinese Crullers ( You Tiau )

6 cups ( 1 1/3 lbs ) high protein flour
2 cups water

(A)
2 tsp. ammonium bicarbonate or 1 Tbs. baking powder
2 tsp. baking soda
1 1/2 tsp. alum ( food grade )
1 1/2 tsp. salt

Oil
  1. Place ingredients of (A) in a mixing bowl; add water and stir until the ingredients have dissolved. Add flour and mix well; let stand for 15-20 minutes. Continue to take some dough around edges and drop it into the center of the bowl 3 or 4 times until the dough is elastic and smooth. Turn the dough over and lightly coat the surface with oil so that the dough will stay moist. Let it stand for 1 hr. Remove the dough from the bowl and place it on a sheet of plastic wrap; wrap the dough and form it into a rectangular shape. Let is stand for 4 hours. If a large batch is made, cut the dough into several 1 1/3 lbs pieces then wrap each pieces in a sheet of plastic wrap.
  2. Unwrap the dough. Use a rolling pin to roll the dough and stretch it into a long strip. Roll the dough into a rectangular shape. 3" wide and 1/2" thick. Crosswise cut the rectangular shape dough into strips 1/3" wide. Put 2 strips on top of each other; use a thin rod ( skewer ) or the back of a cleaver to press lengthwise in middle of the strips; this will attach them securely to each other. Follow the same step for the other strips. Heat the oil for deep-frying; pick up a strip from the ends and gently stretch it to make it longer. Carefully drop it into the hot oil and turn it over continuously with chopsticks until the crueller expands and turns golden brown; remove.

To eat You Tiau with salty soybean milk, here is how ...

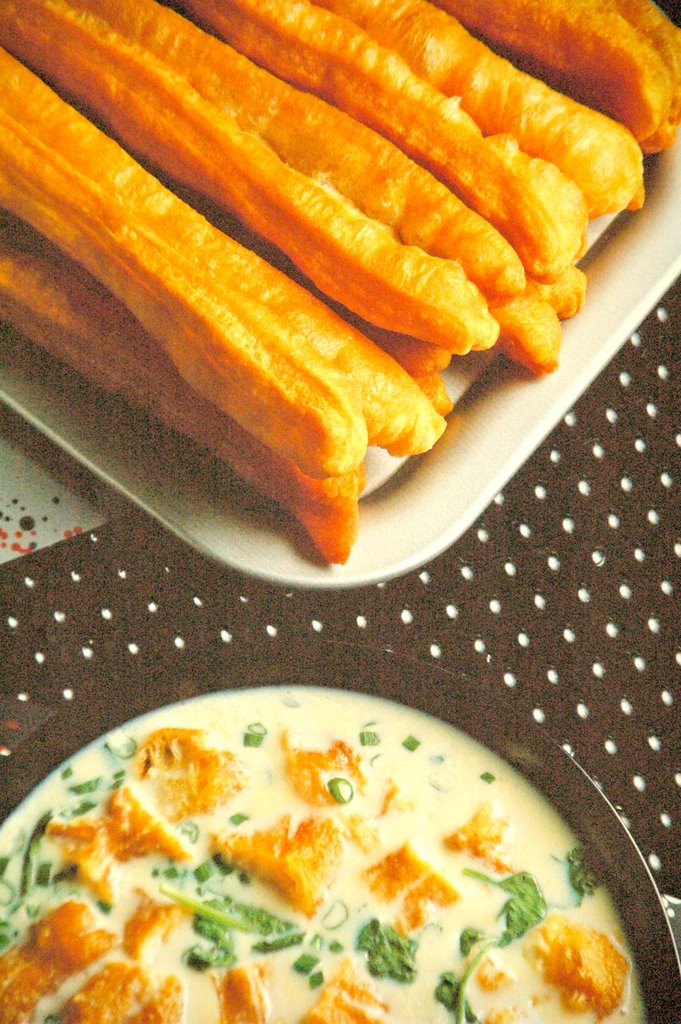
Place the crispy You Tiau, dried shrimp, Szechuan pickled mustard green, green onions, coriander, pork sung ( dried pork shredded/ Abon ), vinegar, chili oil, soy sauce, sesame oil, and salt in a medium size bowl. Pour the boil soybean milk into the bowl and serve.


Pic: Szechuan pickled mustard green

The You Tiau may be placed in split " Flaky Sesame Flat Breads " or Shao Bing. This way is my husband favorite way to eat You Tiau.

Thursday 21 March 2013

HOW TO MAKE DUMPLING SKIN


1) How to Make Dumpling Skins from Scratch


Homemade dumpling skins are better than store bought, and easier to make than you think!

Homemade Dumpling Skins

Homemade Dumpling SkinWay back in 1995, I took a tour around China. Of the many memories I cherish, I remember standing in the doorway of a large kitchen, marveling at a group of ladies sitting around the table, rolling out dumpling skins for a jiaozi lunch later. The process (for them) was quick and effortless. How in the world could they turn out such perfect looking skins?!

If at First You Don’t Succeed

When I returned home to Hawaii, I was invited to a party where some Chinese university students were making dumplings. Again, their skill at dumpling skin rolling was impressive. I tried my hand at making one but it came out woefully lopsided.
Since we were living within heavily Asian communities in Honolulu and San Jose, we had ample access to factory-made, store-bought dumpling skins like the ones we used for our Won Ton Soup recipe. Fresh, store-bought skins are good enough for our use. But I secretly harbored the desire to make my own skins at home.

Get Some Tips First

Last October for our Anniversary, I got Annie the Asian Dumplings cookbook by our friend and fellow food blogger Andrea Nguyen. We were both excited to get the book, and pored over all the recipes trying to figure out which ones we wanted to make. The very first recipe is her Basic Dumpling Dough. That’s a very good place to start!
So when we decided to throw a homestyle Japanese dinner party for our friend Paul and his family, we knew gyozas were going to be on the menu. Earlier in the day of the party, I prepared the dough:

Basic Dumpling Dough

taken from “Asian Dumplings” by Andrea Nguyen
Ingredients:
10 ounces (2 cups) unbleached all-purpose flour
about 3/4 cup just-boiled water
Method:
1. Put flour in a bowl and make a well in the center. Stir the flour while you add the water in a steady stream. Keep mixing until you have a shaggy dough.

Mixing Water into Dumpling Dough

mixing homemade dumpling dough
2. Knead the dough to bring it together into one large ball.
homemade dumpling dough first rest
3. Transfer the dough to a floured work surface (I used a Silpat silicone baking mat) and knead it for a couple of minutes until it becomes smooth and elastic. Seal the dough in a zip-top plastic bag and let it rest for up to 2 hours.

Kneaded Dumpling Dough

homemade dumpling dough kneaded
4. After the rest, pull out the dough and cut it into 4 roughly equal sections. Roll each section into a 1-inch thick log, then cut each log into 8 pieces. Shape each piece into a thick coin or disc. Lightly flour the top and bottom of each disc.
homemade dumpling dough cut
5. Andrea recommends using a tortilla press to flatten out each dough disc. We don’t have a tortilla press, so we used two small plates and a cut-up sandwich bag to press them flat.
homemade dumpling dough press
6. Now here comes the fun part. Holding the flattened disc gently, use a dowel rolling pin to press on just the outer edges of the disc. Roll back and forth once, then rotate the disc. Roll, rotate. Roll, rotate. Add a little flour if necessary to keep it from sticking and tearing.

Rolling out Dumpling Skin

rolling homemade dumpling dough
7. You don’t want to make it too thin. It has to be thick enough to hold whatever filling you’re going to put in it. The final dumpling skin should be just over 3 inches in diameter.

Finished Homemade Dumpling Skin

rolled homemade dumpling dough
(If you need to see the rolling process in action, Andrea just uploaded a new YouTube video on “How to roll out Asian dumpling wrappers”.)


2) Chinese Dumplings - Homemade Wrappers

Related post: Chinese Dumplings - Filling & Dipping Sauce

I have a confession to make. I have been subsisting on boiled Chinese Dumplings (饺子) for the past 2 months. I have them as a main dish, as a side dish, as a snack, as a reward, as a pick-me-up ... oh, you get the idea ;)

This happened after I learnt to make my own dumpling wrappers. The texture of homemade wrappers is light years away from store-bought, frozen ones. I kid you not. It's silky, smooth and delightfully chewy. I love the taste and texture so much that I have been eating them boiled instead of panfried, like I used to (as Potstickers/Guo Tie/Gyoza). Boiling is the best way to truly savour their texture.

Chinese Dumplings Wrappers P1070140
Homemade dumpling wrappers - in perfect circles because I used a cutter :)

Now, making your own wrappers is so easy, I just wonder why I have never attempted to make my own. How difficult is it to mix flour, water, salt and oil together? If you can bake cakes or breads, this one's a no-brainer. I learnt this from Nice Mrs Tan who also taught me Teochew-Style Ngoh Hiang and Hay Bee Hiam.

Note that all these photos were taken on different days, so excuse the terrible "mix-and-match" quality!

Recipe (for wrappers)
- 500g plain flour
- 1 cup slightly warm water (1/3 cup boiling water + 2/3 cup room temperature water)
- 1 tsp vegetable oil
- 1/2 tsp salt
Yields about 800g of dough

1. Add salt and oil to the warm water. Stir till the salt has dissolved completely.

2. In a big pot or deep bowl, pour in plain flour. Add the warm water mixture slowly and stir (using chopsticks). Add a little water each time so that you can judge how wet or dry the dough is. Stop when it looks slightly sticky. Just continue stirring (or using your hands when it gets too sticky) till the dough comes together in a large, clumpy ball. As long as most of the dough clumps together, it's time to stop. Don't worry that it looks lumpy and dry.

3. Seal the bowl with clingwrap and allow to relax for about 10 - 15mins.

4. Now, start kneading. You will notice that the dough no longer looks as lumpy and dry. As you knead, it will become elastic and shiny. If you find that it's too dry, add a little more warm water; if it's too wet, add a little more flour - as simple as that! Throw the dough onto your work surface in between kneads to improve the structure. Those of you who have made breads by hand will be familiar with this routine.

5. The dough is ready to be rolled into wrappers as soon as it is smooth and pliable.

6. Nice Mrs Tan pinched off little balls of dough, one at a time, and rolled them into circular wrappers. Or, you can opt to roll the dough into a thin, flat sheet and use a cutter to cut out circular wrappers.
* Note that there is a reason why Nice Mrs Tan did it her way: wrappers should ideally be thicker in the centre and thinner at the edges (so that the pleats will not be too thick). I saw that as she rolled each ball into flat circles, she smoothed out the edges more, while avoiding the middle. Having said that, if you are a novice making dumplings for the first time, don't fret the small details.

7. Ensure that the rolled wrappers are not too thin, otherwise they will break where the fillings "sit". Sprinkle flour into each wrapper as you "pile" them up in a stack.

Photobucket
Top left: Sticky mixture when warm water mixture is added.
Top right: The clumpy dough after some stirring and moulding.
Bottom left: After letting it rest, knead the dough, slam it against your worktop, and it should look like this.
Bottom right: Pinch into little balls of dough to be rolled out into round wrappers. Or roll out the dough into a flat sheet, then use a round cutter to cut out all the wrappers.

Now you can start wrapping the dumplings. One way is to pleat the edges (to get that gorgeous crescent effect), another is to press the edges firmly with your fingers (and get a simple semi-circle). The wonderful thing about wrapping with homemade, fresh dough is that there is no need to wet the edges with water. The wrappers are naturally adhesive.

These dumplings freeze beautifully. Simply place them neatly on a tray (sprinkled with flour) in the freezer for 10mins. When they have hardened into individual hard blocks, seal them in bags or containers, in quantities of your choice. I usually pack 10 in a bag, enough for 1 serving. When cooking these frozen dumplings, DO NOT thaw. Go straight from freezer to pan/pot.

Chinese Dumplings 1 P1070177
Pleating is easy - 3 pleats on the left, 3 pleats on the right. Gather the pleats inwards, towards the centre. You will get the "crescent" effect. Team work is highly recommended when making dumplings. When Nice Mrs Tan and I made them, we had an unspoken division of labour - she rolled the dough, I did the wrapping. Emile Durkheim would be proud!

Cooking the Dumplings 
Panfried (aka Potstickers/Guo Tie/Gyoza)
1. Add some oil in a huge skillet. When the oil is heated up, place the dumplings neatly to fill up the skillet. Ensure there is sufficient space in between.

2. Allow the skin to crisp and brown.

3. Pour a little hot water into the skillet and cover for 5 mins, so that the steaming effect can cook the dumplings through. Once there is no more water left, dish up the dumplings and serve immediately.

Boiled
1. Heat 1 pot of water (salted).

2. Prepare another pot of cool water (at room temperature).

3. When the first pot of water starts to boil, drop in the dumplings and allow them to cook, about 4 mins.

4. Dish them up with a slotted spoon and plunge them into the pot of cool water for a few seconds.

5. Put them back into the boiling water again for another few seconds and serve.
Trivia: Do not discard the water used for boiling the dumplings. If you have eaten too much and feel like you're suffering from indigestion, drink some of that water. It will take away that full, bloated feeling. Apparently, all old folks who know will tell you that ;)

Chinese Dumplings Boiled P1080249

I highly recommend eating plain, boiled dumplings to appreciate the texture of your homemade wrappers :)
 Boiled Chinese Dumplings are now my everyday food. What's yours? 
You might also like:


Recipe

Mandu Pi
Nothing beats the flavor and texture of homemade dumpling skins. Although it is more labor intensive, dumpling skins aren’t difficult to make. If you must buy them, look for them in the refrigerated sections of most supermarkets. Round skins are preferred for Korean dumplings, but square ones will do if you have no other options.
Yield : Makes 50 skins

Ingredients

  • 3 cups flour
  • ¼ teaspoon salt
  • Water

Directions

1. Sift together the flour and salt. Pour 2/3 cup water in a bowl and add the flour a little bit at a time, mixing with each addition. Continue mixing until the dough is completely mixed and stiff. Wrap in a damp cloth and let sit for about 30 minutes.
2. To roll out the dough, prepare a lightly floured surface. Pinch off small pieces and make them into round balls to roll out flat with a rolling pin. Alternately, roll the dough into small, sausage-shaped rolls and slice them before rolling them into flat circles. Each circle should be about 2½ to 3 inches in diameter.
3. Use to making dumplings. If you are preparing the skins in advance, store by stacking each circle with a little bit of flour between each skin, wrapping the whole stack tightly with plastic wrap. Refrigerate for no more than a week. You may also freeze the skins, but be sure to defrost in the fridge overnight before using.


3) 
How to Make and Wrap Dumplings: Three Methods and Recipes (Video)
Last weekend, as a belated nod to Chinese New Year, I decided to stock up on dumplings. Once in a while, I make a big batch of these bite-size wonders and freeze them for future use. It’s a time-consuming task, but I find it relaxing and I’m rewarded with many great meals to come. Whenever I want a quick & easy lunch, I take out exactly the number of bites I need, cook them from frozen and voilà, I enjoy their crispy and moist deliciousness. Industrially-made dumplings sold in the frozen section of Asian supermarkets are fairly popular and some brands are not too bad, but making them yourself is lots better, believe me. First, you control the thickness of the wrappers you’re using – nothing worse than biting a dumpling and discovering that it’s mostly made of dough, not filling. Second, you know exactly what you put in your dumplings: no fillers, no mystery ingredients, just goodness. And you can play around with the ingredients and invent a new recipe every time!
Beef, Shrimp and Vegetable Dumplings with Dipping Sauce
Another thing that I love about dumplings is that you can wrap them in many ways so they always feel different and new. The crescent shape is a classic so I always make some this way, but I also like to try new methods. This time, I tried a technique I first saw demonstrated by Chef Susur Lee which wraps shrimp filling in a such a way that it makes the dumplings look like little gifts. I also used a dumpling press that I paid less than $3 at the Asian market. The gadget was quick to work with but I found the dumplings it produced the least attractive of the bunch.
If you’ve never made your own dumplings before, now is the time to try. I will guide you through making three different kinds of dumplings:
  • Bow dumplings filled with shrimp mousse
  • Traditional pleated crescent beef dumplings
  • Flat half-moon vegetable dumplings (made using a dumpling press)
Beef dumpling wrapped with classic pleated crescent method.
Dumplings can be cooked in different ways:
  • You can fry and steam them, which turns them into potstickers (my favorite cooking method).
  • You can boil and fry them, which also makes them potstickers. This method works especially well with classic crescent dumplings wrapped in thicker wrappers.
  • For a lighter alternative, you can steam them using a traditional bamboo steamer or more modern accessories like a double-boiler or an electric steamer.
  • I sometimes just throw them in a soup. Wontons are the meat-filled bites that are traditionally added to soups as they’re usually smaller and more delicate, but sometimes I just feel for a comforting soup so a handful of frozen dumplings added to hot broth make a hearty meal in a snap.
Dumplings are best served with a classic dipping sauce. Recipe below!
Beef, Shrimp and Vegetable Dumplings with Dipping Sauce

Dumpling Wrappers

You can make your own wrappers, but I say that making the fillings and wrapping the dumplings is already a big endeavor so save yourself the trouble and buy a stack of pre-made round dumpling wrappers at the store (they are often kept frozen). These wrappers can be used as is, but I flatten them out because I like my dumpling skins to become glistening and translucent after cooking. Thin dumpling skins also fry crunchier (yum!). This technique is also recommended by chef Susur Lee.
To flatten dumpling wrappers:
  • Sprinkle cornstarch on both sides of two (or up to four) wrappers and stack them precisely one on top of the other.
  • Use a rolling pin to flatten the wrappers until they’ve become about 140% bigger.
  • With a 3.5-inch round cookie cutter, cut out new wrappers. Discard the excess dough.
  • Stack the new, thinner wrappers on a plate and cover loosely with plastic wrap while you work on the rest of the wrappers to prevent them from drying and cracking.

Wrapping Methods

There are several different ways to wrap dumplings, the most traditional of which is certainly the classic crescent shape. You can have fun and wrap them in many different ways; I like to use a different wrapping method per filling so that the different varieties are easy to recognize.
Because videos are tremendously helpful to learn new techniques in the kitchen (and because it was easier than try to explain it in words!), I’ve put together a short video in which I show how to flatten dumpling skins, as well as three different wrapping methods: Susur Lee’s “bow” technique, the classic crescent shape and the flat half-moon shape.
Watch below or click here to view the video in HD quality on YouTube (instructions will be easier to read!).
Beef, Shrimp and Vegetable Dumplings Wrapped in Three Different Ways

Filling Recipes

The following three recipes were inspired by Susur Lee but I heavily adapted them to use ingredients that are easy to find. Feel free to use these recipes as a guide and come up with your own variations. You can use a wide variety of proteins as a base, such as duck, chicken, pork, beef, fish, crab or shrimp, or you can go vegetarian by using tofu or only vegetables. Other classic ingredients in fillings include cabbage, green onions, leek and chives. Seasonings can include sesame oil, soy sauce, oyster sauce, garlic, chopped hot peppers (or hot sauce), ginger, lemongrass, and lemon or orange zest.
// Shrimp Filling
Makes about 30 dumplings
1 pound raw shrimp, peeled, deveined and finely chopped
2 ounces bamboo shoots, finely chopped
3 tablespoons ginger, finely grated
2 tablespoons sesame oil
2 ounces cornstarch
1 teaspoon sugar
1/2 teaspoon salt
In a food processor equipped with paddle or dough attachment, combine all ingredients and beat the mixture on medium-high speed until it becomes pasty, about 2 to 3 minutes. Refrigerate until ready to assemble the dumplings.
Raw shrimp filling looks a bit goopy but it cooks to a nice pink color.
Shrimp Dumpling Filling
Beef Filling
Makes about 30 dumplings
1 pound ground beef
½ teaspoon ginger, finely grated
1 tablespoon Worcestershire sauce
2 tablespoons cornstarch
2 ounces egg white
2 ounces Chinese cooking wine
1/2 teaspoon finely grated orange zest
1 teaspoon salt
In a food processor equipped with paddle or dough attachment, combine all ingredients and beat the mixture on medium-high speed until it becomes pasty, about 2 to 3 minutes. Refrigerate until ready to assemble the dumplings.
Texture of raw beef dumpling filling mixed in the food processor with the dough blade.
// Vegetable Filling
You’ll have quite a lot of chopping to do to make this filling. Try and chop everything about the same size to produce a uniform and enjoyable texture. It’s recommended to degorge cabbage before adding it to the dumplings to avoid soggy wrappers. How-to: cut cabbage into small dice, sprinkle with 1 teaspoon kosher salt and let sit for 15 minutes then squeeze all the water out.
Makes about 50 dumplings
2 tablespoons vegetable oil
1 tablespoon ginger, finely grated
1 Spanish onion, cut into small dice
2 ounces bamboo shoots, cut into small dice
1/4 pound green cabbage, cut into small dice
1/4 pound carrots, cut into small dice
2 stalks celery, cut into small dice
2 green onions, finely chopped
1 cup yellow corn nibs (fresh or frozen)
1 ounce shiitake mushrooms (about 6), cut into small dice
1/4 pound baby bok choy (about 2), cut into small dice
2 ounces Chinese cooking wine
2 tablespoons oyster sauce
1 tablespoon sesame oil
3 tablespoons corn starch, mixed with 3 tablespoons cold water
1 bunch cilantro, picked and finely chopped (about ½ cup)
2 additional green onions, finely chopped
Kosher salt, to taste
Pepper, to taste
Preheat a large sauté pan. Add vegetable oil, and cook ginger and onions until translucent. Next, add remainder of the vegetables except the chopped cilantro and two additional green onions, and sweat until the vegetables become soft but retain their shape (about 10 minutes). Deglaze with Chinese wine and reduce by half. Add oyster sauce and sesame oil. Thicken vegetables with cornstarch-water mixture and stir thoroughly to ensure cornstarch won’t clump up. Remove from heat and stir in cilantro and green onions. Taste and adjust seasoning to taste. Cool mixture completely before filling in dumpling dough.
Colorful vegetable dumpling filling.

Cooking Dumplings

// Fry & Steam (Potstickers)This method works with any kind of dumpling. I like to fry flat half-moon vegetable dumplings on both sides: turn them before adding water to the skillet.
Heat vegetable oil in a skillet over medium-high heat. Fry dumplings until their bottom is golden and crisp, about 2 minutes. Add ¼ cup water for every 10 to 12 dumplings, cover immediately and steam for 3 to 4 minutes. Uncover and let any remaining water cook off. Serve very hot.
Dumplings cooked with the Fry & Steam (Potsticker) method.
// Boil & Fry (Potstickers)
This method works best with thicker wrappers and crescent-shape dumplings. I wouldn’t boil delicate bow-wrapped or flat half-moon dumplings. 
Bring a big pot of water to a boil. Add dumplings (don’t overcrowd your pot) and simmer for 6 to 8 minutes. Heat up some vegetable oil in a skillet over medium-high heat. Fry boiled dumplings until their bottom is golden and crisp, about 2 minutes. Serve very hot.
// SteamThis method works best with thin wrappers.Heat one to two inches of water in the bottom of a wok until it simmers. Place a bamboo steamer over the water (the bottom of the steamer must not touch water). Place dumplings in the steamer and cover. Vegetable dumplings will be the quickest to cook (about 3 minutes), shrimp dumplings are ready after 4-5 minutes and beef take about 8 minutes.
Follow the same instructions for a double-boiler. If using an electric steamer, follow the manufacturer’s instructions.

Classic Dipping Sauce

¼ cup soy sauce (I prefer Japanese less-sodium soy sauce)
2 teaspoons sesame oil
½ teaspoon sugar
½ teaspoon rice vinegar
1 small clove garlic, very finely sliced
1 small red hot chili, finely sliced (optional)
Mix everything together and serve in a small dipping bowl with the dumplings.
Beef dumpling wrapped with classic pleated crescent method.

Freezing dumplings

If you intend on freezing dumplings, do so as soon as possible. With time, the filling’s moisture will get through the wrappers and make them all sticky and soggy. If you freeze them as soon as they’re made, they will keep their cornstarch coating and remain easy to manipulate.
As you make the dumplings, line them up on a baking sheet and as soon as one sheet is full, put it in the freezer. Once the dumplings are frozen hard (3 hours later minimum), transfer the dumplings to freezer bags and store until you have a craving for hot and crispy dumplings!
Frozen shrimp and beef dumplings.
Frozen dumplings, wrapped in freezer plastic bags for long-term storage.